

Prepare for Installation
Proper preparation is the foundation of successful motor speed reducer installation, ensuring safety and optimal performance. Start by reviewing the installation manual provided by Changwei Transmission (Jiangsu) Co., Ltd., a professional manufacturer with 10 years of experience in reducers and electric motors. The manual includes model-specific requirements, torque specifications, and safety guidelines tailored to their planetary, helical, and cycloidal pinwheel reducers. Gather essential tools: torque wrenches (matched to the reducer’s bolt specifications), alignment tools (laser or dial indicators), a level, cleaning supplies, and appropriate lubricant recommended by Changwei. Ensure the installation site is clean, dry, and free of debris—critical for preventing contamination of internal components. Verify that the workspace has sufficient lighting and ventilation, and confirm that the load-bearing capacity of the mounting surface meets the combined weight of the reducer and motor (Changwei’s technical data sheets provide detailed weight information for each model). Additionally, wear personal protective equipment (PPE) such as gloves and safety glasses to avoid injuries during handling.
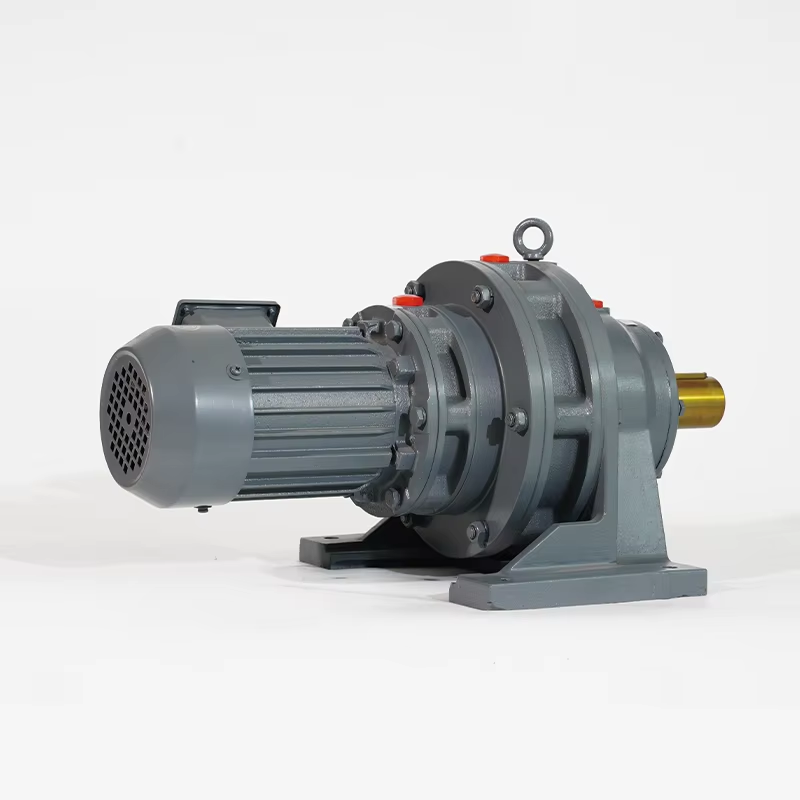
Verify Equipment Compatibility and Condition
Before installation, confirm that the motor speed reducer is compatible with the driven equipment and motor. Check that the reducer’s rated torque, speed, and mounting dimensions match the motor and load requirements—Changwei offers OEM/ODM customization to ensure perfect compatibility, so cross-reference the product’s serial number with the technical specifications provided. Inspect the reducer for shipping damage: check the housing for cracks, the output shaft for bending or scratches, and ensure all fasteners are secure. For Changwei’s gear reducers, verify that the input and output flanges are free of burrs or deformities, as these can affect alignment. Examine the motor’s output shaft and coupling (if used) for wear or corrosion, and ensure the keyway is intact. If the reducer has been stored for an extended period, check for rust or moisture inside the housing—Changwei’s products are sealed with high-quality gaskets to prevent contamination, but visual inspection is still necessary. Confirm that the lubricant (if pre-filled) is at the correct level and has not deteriorated; if not, drain any old lubricant and replace it with Changwei-recommended oil or grease.
Install the Base and Secure the Reducer
A stable base is essential for reducing vibration and ensuring long-term reliability. First, install the mounting base or bracket, ensuring it is level within 0.1mm/m using a precision level. The base should be rigid enough to withstand operational forces—weld or bolt it securely to the foundation, using anchor bolts that meet the reducer’s load requirements. For Changwei’s heavy-duty planetary reducers, reinforce the base with additional support if necessary. Place the reducer on the base, aligning the mounting holes with the base’s holes. Use the correct bolts (supplied or specified by Changwei) and tighten them incrementally in a crisscross pattern to the recommended torque—over-tightening can deform the housing, while under-tightening causes vibration. Ensure the reducer is level both horizontally and vertically; use shims if needed to adjust the height, but avoid excessive shimming that compromises stability. For wall-mounted or vertical installations (common for Changwei’s compact cycloidal pinwheel reducers), follow the manufacturer’s guidelines for bracket strength and mounting orientation to prevent axial or radial stress on the output shaft.
Align Motor and Reducer Precisely
Precise alignment between the motor and reducer is critical to avoid premature wear, noise, and reduced efficiency. Misalignment is a leading cause of bearing failure and gear damage, so use professional alignment tools for accuracy. First, perform rough alignment by adjusting the motor’s position so that the input shaft of the reducer and the motor’s output shaft are coaxial. Then, use a laser alignment tool (preferred for high-precision applications) or dial indicators to check radial and angular alignment. For Changwei’s helical gear reducers, the maximum allowable misalignment is typically 0.02mm for radial deviation and 0.1mm/m for angular deviation—refer to the installation manual for model-specific values. Adjust the motor’s position using shims under the motor feet until alignment is within tolerance. If using a coupling (flange, flexible, or jaw coupling), ensure it is correctly sized and installed without excessive tension. For direct-mounted motor-reducer combinations (a specialty of Changwei), verify that the motor’s flange fits seamlessly with the reducer’s input flange, and tighten the connecting bolts evenly. Recheck alignment after tightening to ensure no shifts occurred.
Connect the Driven Equipment
Once the motor and reducer are aligned and secured, connect the reducer’s output shaft to the driven equipment (e.g., conveyor, pump, or machine tool). Choose the appropriate coupling or connection method based on the application: keyed connections, splines, or flanges—Changwei’s reducers support various connection types to meet diverse needs. Ensure the key is properly seated in the keyway of both the reducer shaft and the driven equipment’s shaft, and secure it with a setscrew if required. For belt or chain drives, install the pulley or sprocket on the reducer’s output shaft, ensuring it is centered and tightened to the recommended torque. Adjust the tension of belts or chains to avoid excessive load on the reducer’s bearings—Changwei’s technical team can provide guidance on proper tensioning. Verify that the connection is free of binding: manually rotate the driven equipment to ensure smooth movement without resistance. If the reducer has a brake or clutch, test its functionality to ensure it engages and disengages properly before powering on.
Perform Electrical Wiring (If Applicable)
For reducers integrated with motors (such as Changwei’s motor-reducer combinations), follow strict electrical wiring procedures to ensure safety and correct operation. First, disconnect the power supply to prevent accidental startup. Refer to the wiring diagram provided by Changwei, which complies with IEC, EN, and ANSI standards, to connect the motor’s power cables to the control panel. Ensure that the voltage (e.g., 380V-660V for high-power models) and phase sequence match the motor’s specifications—incorrect phase sequence can cause reversed rotation. Secure all electrical connections with wire nuts or terminal blocks, and insulate them properly to prevent short circuits. For reducers with additional electrical components (e.g., thermal overload protectors or encoders), connect these according to the manufacturer’s instructions. Test the wiring with a multimeter to confirm continuity and correct polarity. Finally, install the electrical cover and ensure all cables are routed away from moving parts to avoid damage during operation.
Fill with Recommended Lubricant
Lubrication is vital for reducing friction between gears and bearings, extending the reducer’s lifespan. Changwei specifies the type, grade, and quantity of lubricant for each reducer model—use only the recommended product (e.g., ISO VG 220 gear oil for helical reducers, lithium-based grease for small cycloidal models). Locate the lubrication fill port (usually on the top of the housing) and remove the plug. Use a funnel or grease gun to fill the reducer slowly, checking the oil level through the sight glass or dipstick. Do not overfill, as excess lubricant can cause overheating and leakage; fill to the middle of the sight glass or the marked level on the dipstick. For reducers with a drain port, ensure the plug is securely tightened to prevent leaks. After filling, let the lubricant settle for 10-15 minutes, then recheck the level. For high-temperature or heavy-load applications, Changwei may recommend synthetic lubricants for enhanced performance—follow these recommendations to avoid premature component failure.
Conduct Trial Run and Performance Testing
A trial run is critical to identify potential issues before full-load operation. Start by powering on the motor-reducer system at no load (disconnect the driven equipment if necessary) and run it for 15-30 minutes. During the trial run, monitor the following: operation noise (should be smooth and free of grinding or knocking sounds—Changwei’s reducers are designed for low-noise operation), vibration (use a vibration meter to check for excessive movement), and temperature (the housing should remain within the specified range, typically 60-80°C; if it exceeds 90°C, shut down immediately to investigate). Check for lubricant leaks around the seals, flanges, and drain plug. Verify that the output speed matches the expected value (refer to Changwei’s technical data sheets) using a tachometer. Gradually apply the load in increments, monitoring performance at each stage. If abnormal noise, vibration, or temperature rise occurs, stop the system, identify the cause (e.g., misalignment, insufficient lubrication, or overloading), and rectify it before resuming operation.
Secure All Components and Final Inspections
After successful trial run and load testing, perform a final inspection to ensure all components are secure and properly installed. Re-tighten all bolts, including mounting bolts, coupling bolts, and electrical connections, as vibration during the trial run may have loosened them. Check that all safety guards (for moving parts like couplings or pulleys) are installed correctly to prevent accidents. Verify that the lubricant level is still within the recommended range and top up if necessary. Clean the reducer housing to remove any debris or excess lubricant. For outdoor or harsh environment installations, ensure the reducer is protected from moisture, dust, or corrosive substances—Changwei offers corrosion-resistant coatings for such applications. Document the installation details, including the date, model number, lubricant type, alignment measurements, and trial run results, for future maintenance reference.
Post-Installation Maintenance Guidelines
Proper post-installation maintenance ensures the motor speed reducer operates reliably for years. Follow Changwei’s maintenance schedule: change the lubricant after the first 500 hours of operation (break-in period) and then at regular intervals (typically 2000-5000 hours, depending on the model and application). Regularly inspect the lubricant for contamination or degradation (cloudiness, discoloration, or metal particles) and replace it if needed. Check alignment periodically, especially after heavy loads or equipment movement, and re-align if necessary. Monitor vibration and temperature during operation—sudden changes may indicate emerging issues. Inspect seals and gaskets for leaks and replace them if worn. Use only genuine spare parts from Changwei, such as bearings, seals, and lubricants, to maintain performance and compliance with warranty terms. If any issues arise, contact Changwei’s after-sales service, which provides technical support and on-site assistance for their globally supplied products.
Table of Contents
- Prepare for Installation
- Verify Equipment Compatibility and Condition
- Install the Base and Secure the Reducer
- Align Motor and Reducer Precisely
- Connect the Driven Equipment
- Perform Electrical Wiring (If Applicable)
- Fill with Recommended Lubricant
- Conduct Trial Run and Performance Testing
- Secure All Components and Final Inspections
- Post-Installation Maintenance Guidelines